
Let's simplify publishing new NuGet packages for x++ builds
SMTP Relay for AX
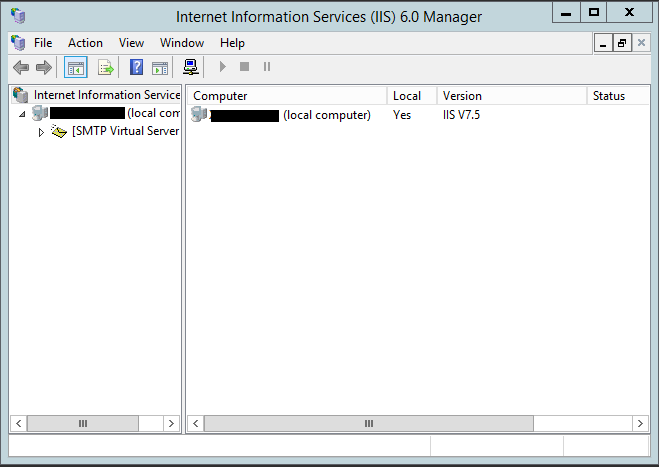
Configuring a relay SMTP server for some of the AX email functions can be tricky if it's your first time doing something like that. However, Microsoft already has a great article to help out with that. However, after doing this a few different times, I thought some screen shots for others may be helpful. We'll start after the relay is installed. First, let's start Internet Information Services Manager by clicking start then typing "inetmgr" and hitting enter.
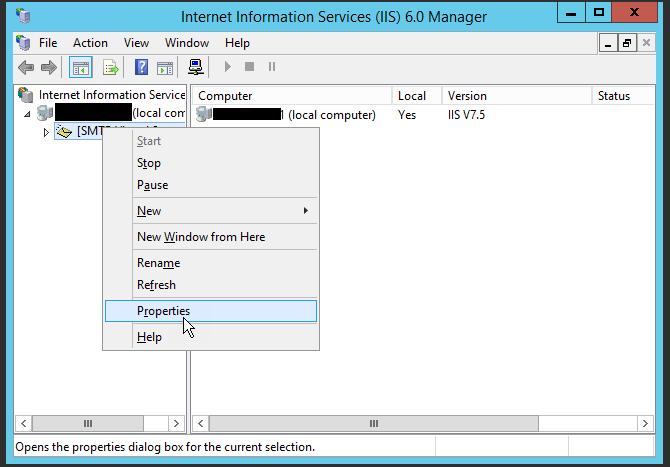
Click Properties on the SMTP Virtual Server
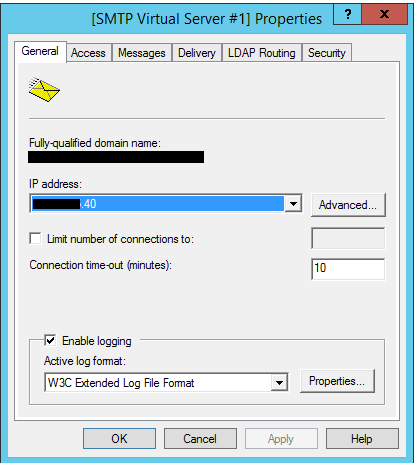
Properties
Click on Advanced
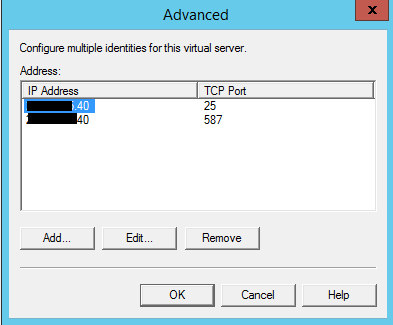
Here we can add the various ports we want to have our relay listen on. In this instance we have the standard SMTP and TLS MSA. Next, click on the access tab
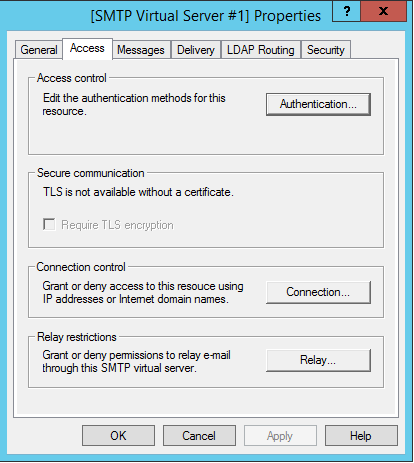
Click on Authentication
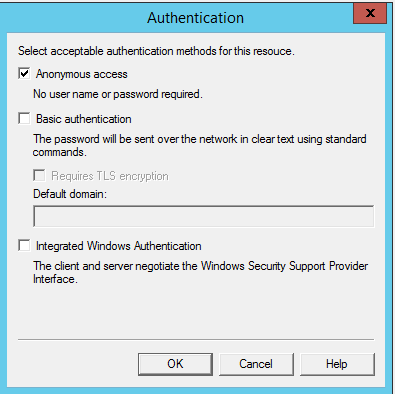
click ok/cancel. Click "Connection..."
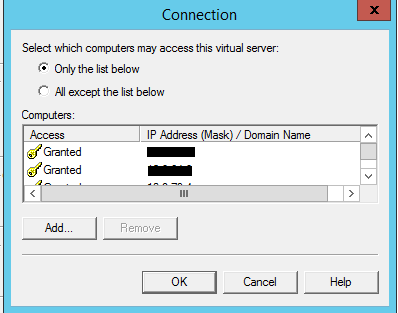
Here is where we will specify the servers that can use the relay. We want to limit this list to the IPs of our AOS servers more than likely. Click OK then click on "Relay..."
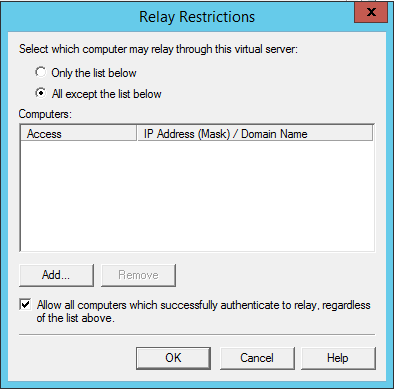
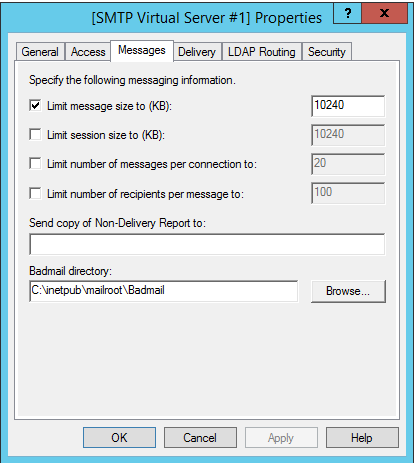
Click ok/cancel. Click onto the Messages tab.
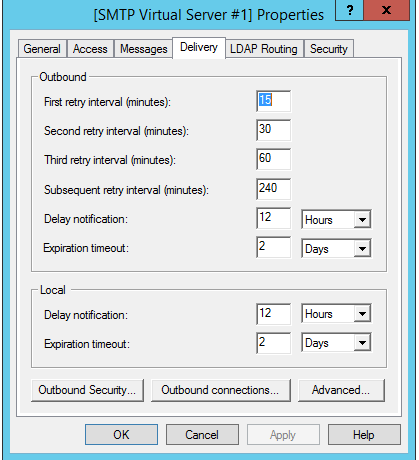
Inspect settings then click onto the delivery tag.
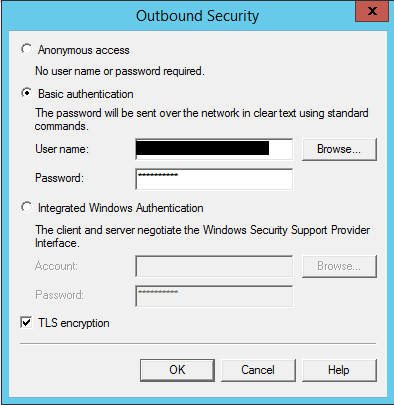
Click on "Outbound Security". Here is where we will specify that account that is used to relay the message onto the target server, in this instance its Office 365. This should be a mail account in the form of account@domain.com with a password. This account will also need the ability to send on behalf of known reply address, like noreply@domain.com. Click ok.
Next, click "outbound Connections".
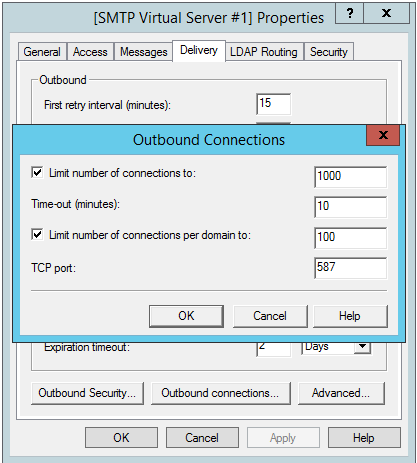
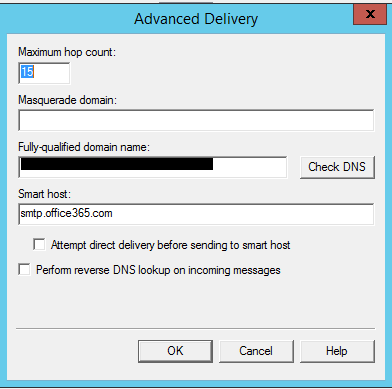
Click Ok. Next, click on "Advanced". Here is where we will specify our smart host. In this instance, we are using Office 365.
Click ok. Click onto the LDAP Routing tab.

Click onto the Security Tab.
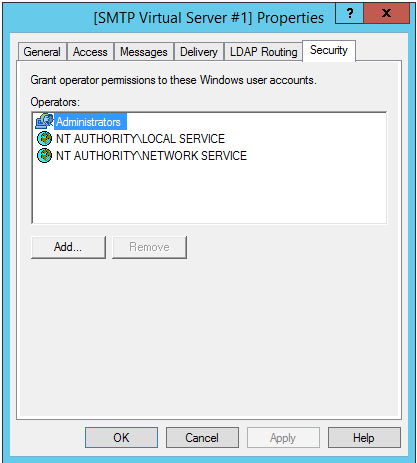
Click ok. Restart the SMTP relay just to make sure all settings have applied and viola, you should now have an SMTP relay for AX. Next, we'll need to go into AX to configure it. Go to System Administration > Setup > System > E-mail Parameters.
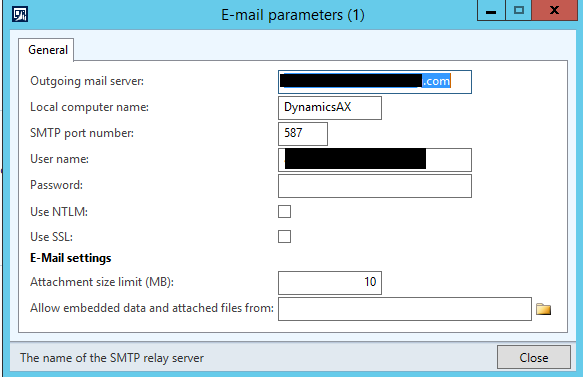
Here we can specify the IP or resolvable name for our relay, our preferred port number which should be 587 and or username / password that we specified for the relay. Although obfiscuated, this example used no-replay@domain.com for both. Finally, let's test it.
static void testEmail(Args _args)
{SysMailer sysMailer = new SysMailer();
sysMailer.quickSend("noreply@domain.com","me@domain.com","test","test");
}
If all went well, you should get an email.