
Let's simplify publishing new NuGet packages for x++ builds
Using Git with 1 Package
Using Git with 1 Package
When using Git for F&O, there are 2 basic flavors of using it; with 1 package or more than 1 package. This post will cover how to setup Git for use with 1 package.
To learn out to create a Git repo in Azure DevOps, please refer to MSFT documentation. To learn how to create a repo on Github, please refer to GitHub documentation.
Using Azure DevOps
In your dev VM, open Visual Studio then open Team Explorer. Click on Manage Connections then Connect to a project.

Next, select your repo and place it in your PackagesLocalDirectory. K drive on cloud hosted machines and C on VHDs.
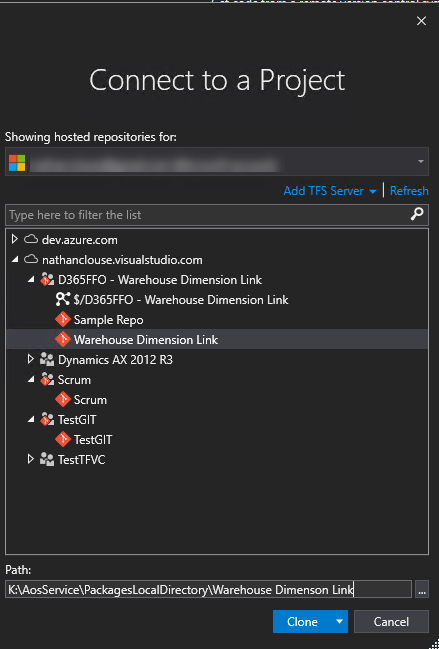
Wait for it to clone and, that's it. Refresh your models like usual and you can develop against 1 package using Git in Azure DevOps. This is what the sync'd directory will look like.

Using GitHub
In your dev VM, open Visual Studio then open Team Explorer. Click on Manage Connections then click Clone

Log into GitHub then select your repo making sure to change the local path to include your PackagesLocalDirectory path.
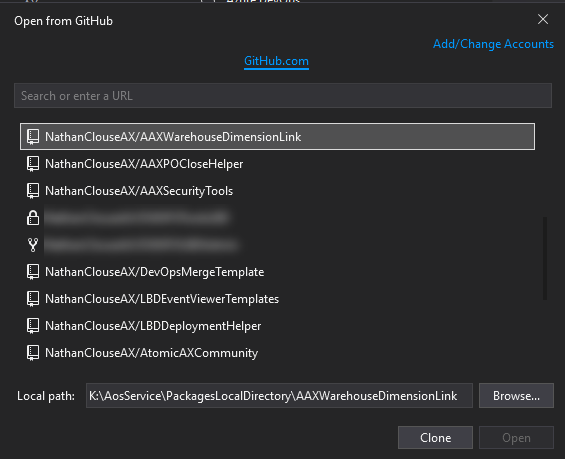
Click clone and wait. That's it. Your repo folder will look like this:

Callout: If using VHD, drive will be the C drive rather than K drive.
Conclusion
Very straight forward process. However, when using this style of package manage, you will only ever be allowed 1 package. You can add as many models as you like but you'll only ever have 1 package. This includes ISV packages as well including binary or source packages. I recommend this style of management for personal projects or something you'll be sharing on GitHub. I wouldn't recommend this approach for use on an implementation project.